
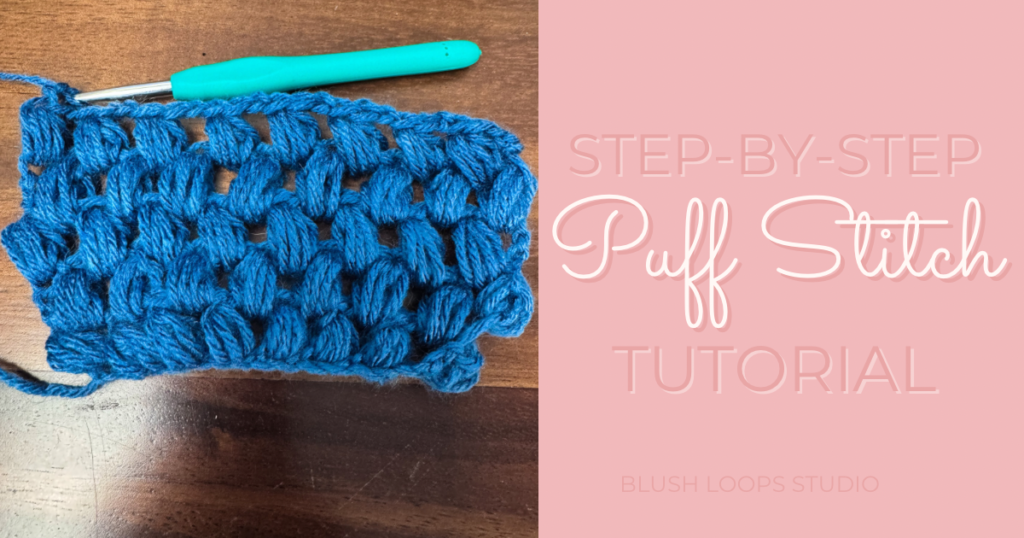
The puff stitch is a fun crochet stitch that adds texture and dimension to your crochet projects. While it may look advanced at first, it’s completely achievable for beginners with the guidance of this tutorial.
In this tutorial, you’ll learn exactly what the puff stitch is, how to crochet it step-by-step, tips for success, common mistakes and fixes, and related crochet stitches.
What Is the Puff Stitch?
The puff stitch is a decorative stitch that adds both texture and dimension to your crochet projects. This stitch is often confused with the Popcorn or Bobble stitch, which are similar. However, the puff stitch is softer and less structured than the former.
The puff crochet stitch is formed with a series of yarning over and inserting the hook into the same stitch a specified number of times, and finally pulling the yarn through all loops on the hook at one time. The number of times you yarn over and pull through the stitch will affect the width of the final stitch. The height of the stitch can be adjusted by pulling the loops longer or shorter.
Skill Level: Advanced Beginner
Abbreviations: Puff st or PS
This stich can be successfully completed by an advanced beginner. The biggest factor in successfully creating the puff stitch is tension control. Because you are pulling up multiple loops in one stitch and then pulling through all of them at once, your tension needs to be accurate.
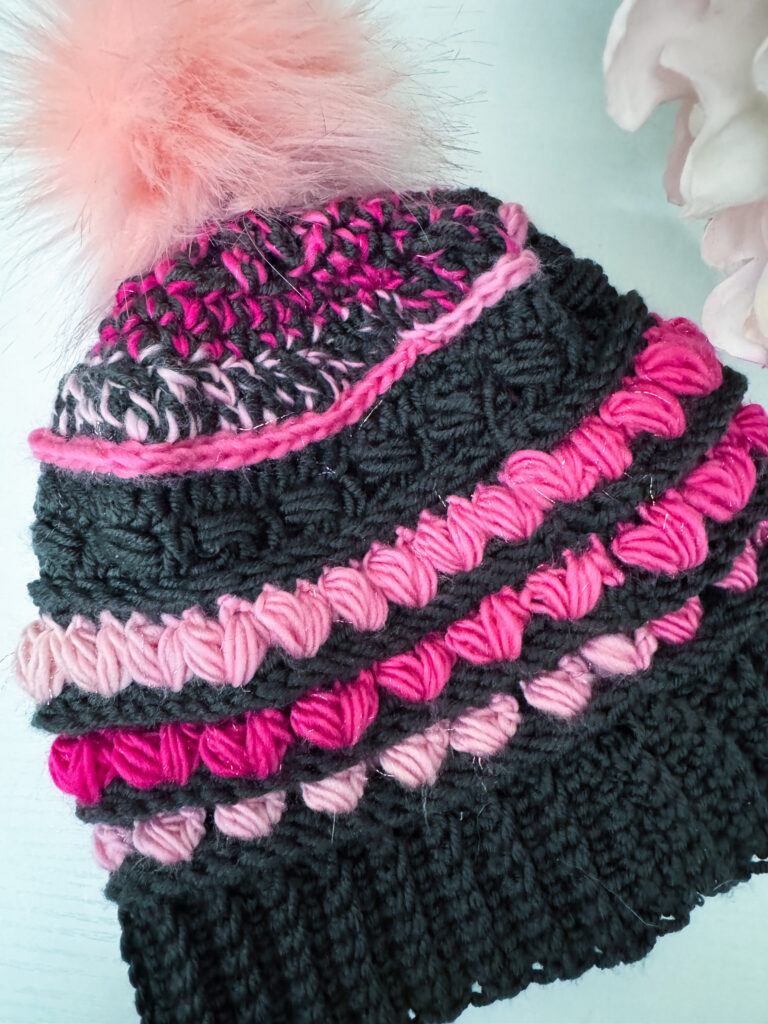
Don’t let this discourage you from trying, though. This is such a fun and beautiful crochet stitch that you will want to be adding to all of your projects ASAP. Like this beanie, where I added two puff stitches together to make a heart shape decorative row.
What You’ll Need
If you are currently working on a specific project, you’ll have instructions for what yarn and hook size you should be using to obtain gauge. For the purpose of practicing the puff stitch, I have included some yarn recommendations and some to avoid while learning this stitch.
Yarn Recommendations
- A medium weight (4) acrylic yarn (acrylic glides easier than cotton, wool, or other blends. And for this stitch, an easy glide is important when first learning).
- Stick to light or pastel colors at first to help with counting the number of loops on your hook
Avoid These Yarn Options
- Fuzzy or eyelash yarn
- Dark colors (black, dark brown, navy)
- Yarns that are prone to splitting easily (100% cotton, bamboo, yarns with a a lot of plies)
How to Crochet the Puff Stitch (Step-by-Step)
There are many variations of the puff stitch, but this is the classic beginner-friendly version using half double crochet height loops. Note: you are not making half double crochets; this is just used as a reference for how high to pull your loops.
Check out this YouTube Short on making the Puff Stitch.
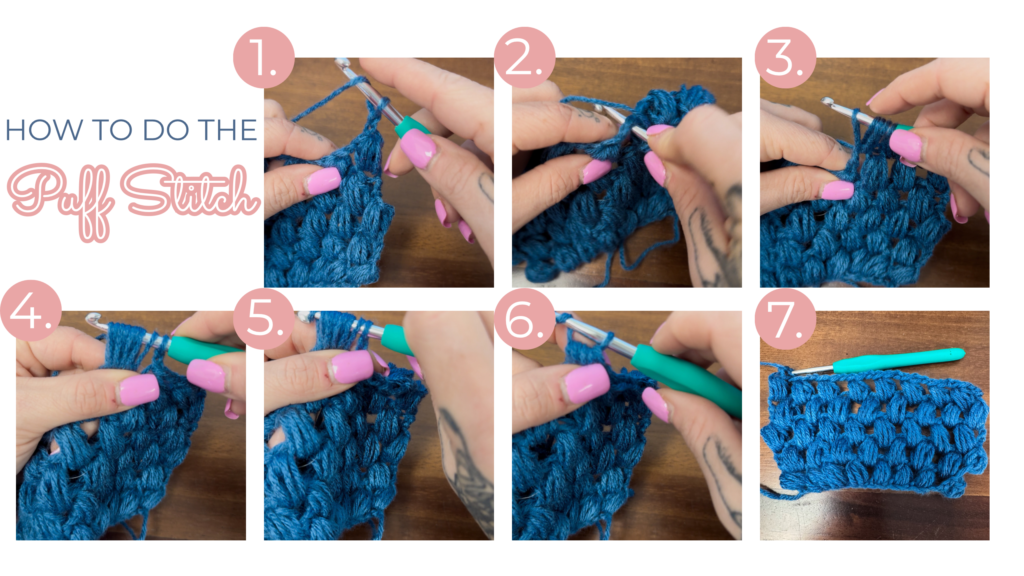
Step 1: Yarn over your hook.
Step 2: Insert your hook into the designated stitch or space.
Step 3: Pull up a loop to roughly the height of a double crochet. It’s ok to eyeball this part, but this is a good starting point. Making your loops to short will make the final pull through too difficult as the loops will be very tight.
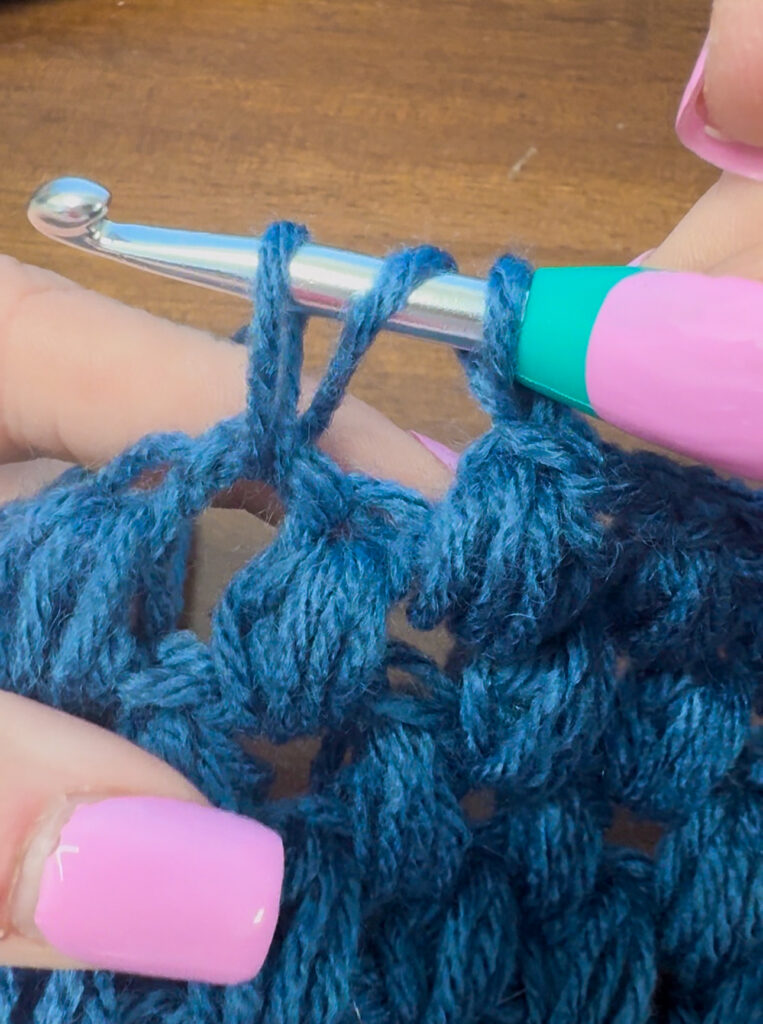
You should now have 3 loops on your hook.
Step 4: Repeat steps 1-3, 3 more times. Yarn over, insert your hook into the same stitch, pull up a loop again.
- Yarn over, insert, pull up loop (4x total)
- You should have 9 loops on your hook at this point
Step 5: Close the Puff. Yarn over one last time and pull through all loops on your hook.
Step 6: Chain 1 to close and secure the puff stitch. This gives your puff stitch structure and will ensure it stays in place and doesn’t unravel.

Helpful Tips
If you are struggling to master this stitch, try implementing the following tips for success.
- Tension: This stitch requires a looser tension than other stitches. Relax the hand holding your yarn and let it glide through your hands. You may need to initially remind yourself to loosen up, especially before the final pullthrough.
- Counting: This stitch requires accuracy in counting the number of loops you have for each stitch. I recommend counting each stich after you yarn over and pull through the stitch. So 1 yarn over + 1 insert, yarn over, and pull through=1. You will count to 4 with this method. Or, you could count each loop. With this method, you will count to 8 before yarning over to pull through all 9 of the loops.
- Hook Sizing: If you are just starting out and practicing the puff stitch, try going up 0.5mm or 1mm from the yarn’s recommended hook size. This will help your loops not be too tight. Also, a rounded tip compared to a pointy tip will help keep the yarn from splitting as easily.
- Keeping Rows Even: If you are doing multiple rows of puff stitches it’s important that you maintain the same number of puff stitches in each row. Be sure to count at the end, as it’s common to skip the last puff stitch that often belongs in the the top of the chain space from the previous row.
Common Mistakes and How to Fix Them
If you make mistakes while learning the puff stitch, it’s ok, and normal. This stitch will come with time, practice, and patience. In the meantime, you can read through these common mistakes and adjust to fix them.
- Inconsistent Puffs: This often happens due to losing count of how many loops are on your hook before the final pull through.
- The Fix: Count the loops out loud. Before pulling through, hold your hook up tight against the loops and count each strand of yarn on the hook.
- Hook Catching: If your hook is catching on your final pull through it could be because your loops are too small, your hook angle is wrong, or your tension is too tight.
- The fix: If your loops are too short, try pulling the first loop up higher and then match all remaining loops to that first loop. If this problem is happening due to the angle of your hook, try the following: ensure your hook is underneath your hook, not sideways, which will catch on the loops as you pull through. Also, try pulling with the hook parallel to the loops, not angled up or down. Finally, if your tension is too tight, the last full through will be difficult. Manually remind yourself to loosen up the working yarn in your hand before pulling through until it becomes habit.
Related Crochet Stitches
These stitches may be a more advanced stitch, including the puff stitch, or they are similar in style.
- Popcorn Stitch
- Bobble Stitch
- Cluster Stitch
- Jasmine Stitch
This stitch is part of the Stitch Library, a growing collection of beginner-friendly crochet stitch tutorials designed to help you learn stitches without the overwhelm.
Pingback: Popcorn Stitch Crochet Tutorial - Blush Loops Studio